The Walled Garden: Shelter, Work and Design
Learn how a walled garden balances shelter, paths, beds and access, then adapt its productive layout to the conditions and chores of your own plot.
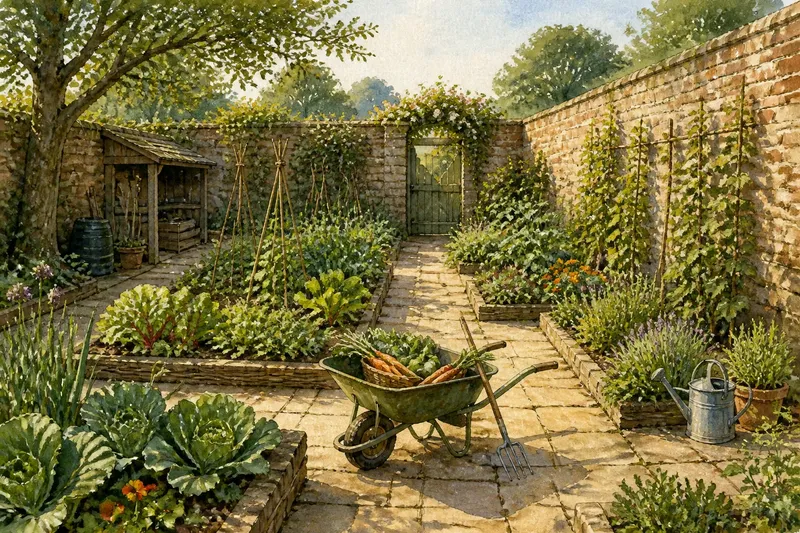
A walled garden works when its shelter helps crops without making daily jobs harder. To plan a walled garden of your own, start by noticing where wind, sun, water and people move through the space; then arrange beds and paths around those realities. The old kitchen-garden idea was not simply to enclose plants. Walls protected valuable food crops, while the layout made planting, harvesting and carrying supplies manageable.
What should the walls do?
Before drawing beds, decide what the enclosure needs to protect. A wall can reduce exposure to wind, create a warmer pocket for suitable plants, screen a work area or define a clear boundary. These benefits depend on its height, material, orientation and surroundings. A sheltered corner can help tender crops, but the same wall may cast shade or hold damp air where it is not wanted.
Walk the site at different times of day. Note which sides receive direct sun, where wind presses hardest, and where rainwater runs or gathers. Look for existing trees, fences and buildings that already provide shelter. The aim is not to seal the garden from every breeze; it is to reduce the exposure that makes productive growing difficult while keeping the space pleasant to work in.
Walls also have a practical cost: they take up room, may need maintenance and can make access awkward if the enclosure has only one narrow entrance. Consider how a wheelbarrow, compost, tools and harvested produce will get in and out. For a new or altered wall, check local requirements and consult a qualified professional where construction or safety questions arise.
How should you read the site before drawing a plan?
Make a simple sketch of the enclosure as it exists, including gates, walls, slopes, trees, taps, drains and places where water stands. Add the sunniest areas and the portions that remain shaded. You do not need a scaled architectural drawing at first. A clear map of constraints is more useful than a beautiful plan that ignores a difficult gate or a patch that never dries.
Next, watch how you already move through the space. Where would you naturally enter with a basket? Which route connects the water source to the beds? Is there room to turn a barrow without brushing plants? These observations reveal the working lines of the garden. Historically, kitchen gardens joined protection with routine: plants were close enough to tend and harvest, and paths connected the tasks rather than serving as decoration alone.
Imagine you have a compact plot with a sunny wall on one side, shade near a mature tree, and a gate at the far corner. You sketch a direct path from the gate to a central turning space, then place sun-loving vegetables in the bright beds and herbs where they are easy to reach from the path. The expected observable result is a plan with a clear carrying route and planting areas matched to the light, rather than beds placed only for symmetry.
Where should paths and beds go?
Lay out the routes before settling on bed shapes. A main path should connect the entrance, water access, storage or compost area, and the parts of the garden you visit most. Smaller paths can branch to individual beds. Keep the route simple enough to follow with a full basket, and leave a turning point where a barrow can be repositioned without stepping onto cultivated soil.
Then divide the remaining ground into beds that you can reach comfortably from their edges. Avoid making a bed so wide that routine weeding or harvesting requires standing in it. Narrower beds may be less formal, but they reduce compaction and keep the central soil available for roots. If the enclosure is small, a few practical beds can outperform a maze of decorative paths.
Give each bed a reason to be where it is. Put frequently picked crops near the route you use every day; place plants needing more attention where you can see them; reserve less convenient corners for crops that do not need constant visits. Keep taller plants from casting unwanted shade across shorter, sun-hungry crops. Paths should also lead to the places where you will set down a harvest or carry in mulch, rather than ending at an attractive dead end.
How can the walls help without causing trouble?
Use the enclosure as a set of distinct growing conditions, not as one uniform climate. A sunny wall may suit plants that benefit from warmth, while the cooler side can accommodate crops that tolerate less direct sun. A wall can also shelter a seedbed or a climbing plant, provided the chosen location has suitable light and room for access.
Pay attention to the ground immediately beside masonry. Rain may run off in a way that leaves one strip dry and another damp; roots may compete with nearby trees; and shade can vary sharply over a short distance. Check soil by hand after ordinary weather and observe how quickly the surface dries. Direct planting and watering decisions to those local conditions rather than assuming that every sheltered bed needs the same treatment.
Do not treat every wall as a support for climbing plants. A climber can shade a bed, obstruct a path or make repair access difficult. Choose a plant and support that suit the wall and the space, and keep the route clear enough for routine jobs. The least useful effort is adding complicated trellises or decorative partitions before you know whether the garden needs them; let a season of ordinary use reveal what is missing.
What should you decide before planting?
With the routes and growing conditions mapped, choose crops according to how you use them. A kitchen garden is most productive when its planting reflects meals, storage habits and the time available for care. Make a short list of vegetables, herbs or fruit you actually want, then place each according to light, shelter, access and its likely spread. Leave space for paths and mature growth instead of filling every patch on paper.
Group crops with similar needs where that makes watering and care simpler, but avoid turning the whole garden into a single crop block. A mix of uses can make the space easier to manage across the season: some areas may be harvested often, while others need less attention. Keep a small working area for compost, pots or tools if those tasks are part of your routine. Hiding every practical feature behind a screen can make the garden look orderly while adding unnecessary trips.
Also decide how you will move soil amendments and harvested produce. If compost is kept outside the enclosure, ensure the route to the beds is direct. If it is inside, choose a place that does not take the best light or block a path. The right location is the one that supports repeated work without making the growing area feel like a corridor between storage points.
How do you turn the plan into a working layout?
Mark the proposed paths and bed edges on the ground with string, a hose or temporary stakes. Walk the routes carrying an empty basket or pushing a wheelbarrow. Check whether gates open freely, whether you can reach each bed from a path, and whether the layout leaves a clear place to turn. Adjust the marks before preparing soil; moving a line on the ground is easier than relocating an established bed.
Test the design against ordinary tasks. Picture weeding after rain, carrying a watering can, bringing in mulch and collecting a full harvest. Notice where your feet would go and whether tools can pass without catching plants. A plan that looks balanced from above may fail at ground level if the main path narrows beside a bed or the compost route crosses the most crowded planting area.
Once the routes feel workable, prepare the beds in a way that suits the existing soil rather than imposing a uniform recipe. Remove persistent weeds, loosen compacted ground where appropriate and add organic matter suited to the bed. Keep path material distinct from growing soil so the working routes remain legible. If labels, product instructions or local rules affect a material or structure, follow them and seek qualified advice where necessary.
Which questions help refine a walled garden plan?
Should every bed run parallel to a wall?
No. Align beds with the easiest access, useful sunlight and the shape of the ground, rather than following masonry automatically. A crosswise bed may make better use of a narrow plot or keep the main route direct.
Can a small walled garden still feel open?
Yes. Keep the central route clear, avoid filling every corner with structures, and let the enclosure remain visible where that helps the space feel legible. A few well-placed beds often leave more room to move than many small compartments.
Where should a compost area sit?
Put it somewhere convenient to reach from both the beds and the garden entrance, without blocking the route or taking the best growing position. Consider shade, drainage and how you will carry material in and out.
Does a wall mean the garden needs a formal layout?
No. The enclosure can provide a strong boundary while the beds remain simple and practical. Use symmetry only if it helps with access, maintenance or the kind of space you want to use.
How should the layout change after you begin using it?
Treat the first arrangement as a working plan, not a permanent statement. Keep a brief note of where water lingers, which paths become muddy, where plants crowd one another and which beds you visit most. These are visible clues about the relationship between enclosure and work. Change one troublesome feature at a time so you can tell whether the adjustment improves access or growing conditions.
At the end of a growing period, review the routes as well as the crops. A path that looked generous before planting may be difficult to use once foliage spreads. A sheltered corner may suit a crop better than expected, or prove too shaded for it. Move beds, supports or storage only where observation gives you a practical reason, and preserve the clear routes that make daily care manageable.
A well-planned walled garden is not defined by a particular historical pattern or a perfectly symmetrical drawing. Its design succeeds when the walls moderate exposure, the paths make work direct and the beds fit the light and soil you actually have. Keep that balance in view as you refine your walled garden: shelter should support growing, and every useful feature should earn the space and effort it asks of you.